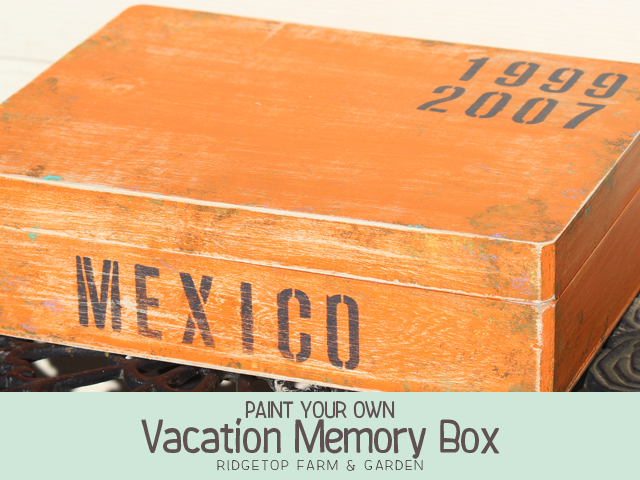
I love to travel & I can’t help but collect goodies while traveling. Back in the old days, I would add those goodies to my vacation scrapbooks. However, I was always nervous about it due to acid and such in the cheaply produced maps and ticket stubs. Now, though, I create digital scrapbooks and add photos of those tickets and maps – which leaves me with the originals. Usually they end up in an envelope crammed onto an unsightly shelf full of similar items. There they sit. Never to be looked at again. When I saw Martha Stewart’s Travel Keepsake Kits, I knew this was my solution.
Honestly, it took me a awhile to get around to making them. But, I did make them – a slightly distressed version of Martha’s. And, I love them. They’re fun and bright and full of fabulous memories.
This post contains affiliate links.
SUPPLIES
• Memory Box
• Stencils
• Acrylic Paints
• Paintbrush, sponge & spouncer
• Sandpaper
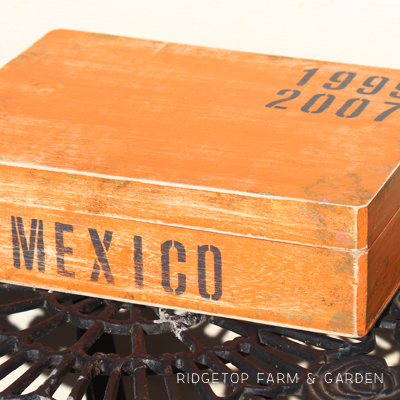
THE BOX
I would have liked to purchase the boxes Martha suggested, however they were almost twice as expensive as similar ones I found. Had I been buying only one box, I probably would have sprung for Martha’s. But, I was buying 5. So, I went with the cheaper Darice brand box.
I don’t know the quality of Martha’s box, so I can’t compare. But, I can say the boxes I did buy aren’t heavy duty. I’m sure they wouldn’t hold up to constant open and closing. Mostly, though, mine are sitting on a bookshelf looking pretty. I’m going to guess they’ll last quite a long time in that situation.

STEP 1: PAINTING THE BOX
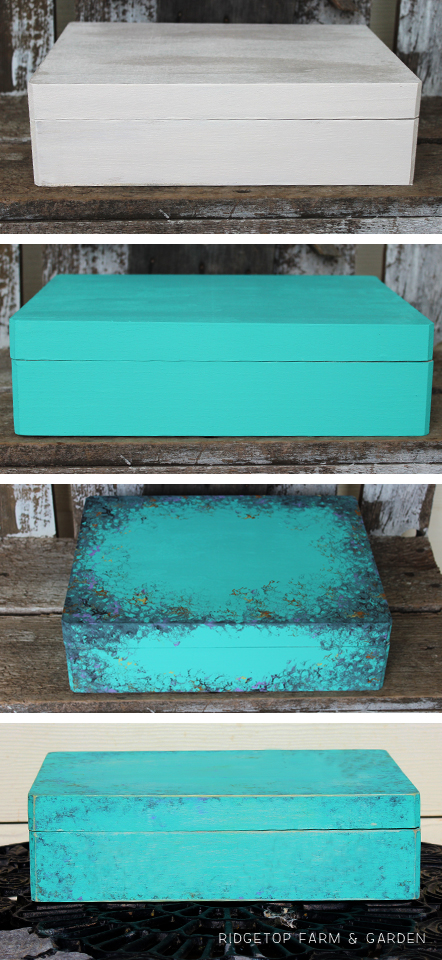
First: I “primed” the box with a coat of ivory paint.
Next: I painted the box in my chosen color.
Then: To add a distressed look, I used a sponge to dab on various colors – mainly around the edges.
Last: I added way too much paint on the distressed layer, so I sanded most of it off. The sanding added a new aspect of distress, which I liked.
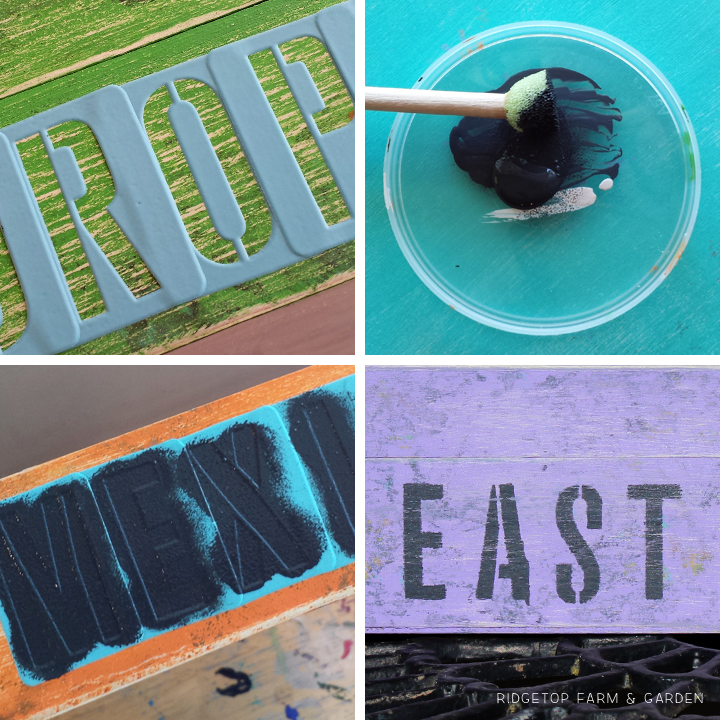
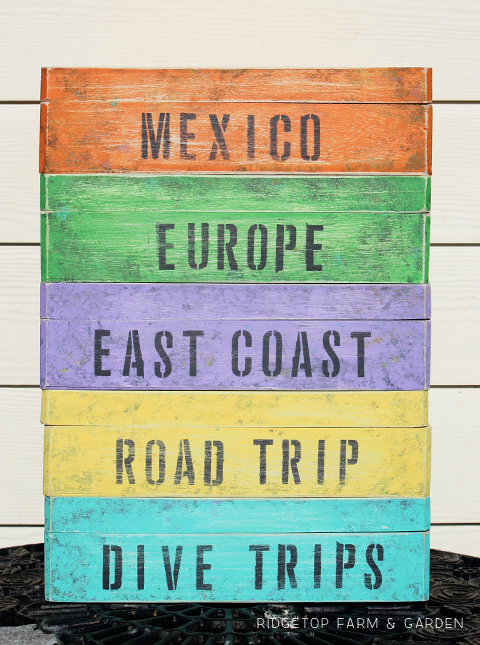
STEP 2: PAINTING ON THE DESTINATION
I scoured craft stores and the internet for stencils. In the end, I opted for the ones Martha suggested. I love them! They are adhesive, yet repositionable. I’ve used them on many projects since these boxes and they’re still holding up.
I positioned the letters on the box, then used a spouncer to dab on charcoal colored acrylic paint. I tried to dab ever so lightly so the paint wouldn’t seep under the stencil. It wasn’t perfect, but mostly I did an ok job.
In case you’re wondering, my fancy paint palette is a pringles lid. They make perfect palette’s for small amounts of paint.
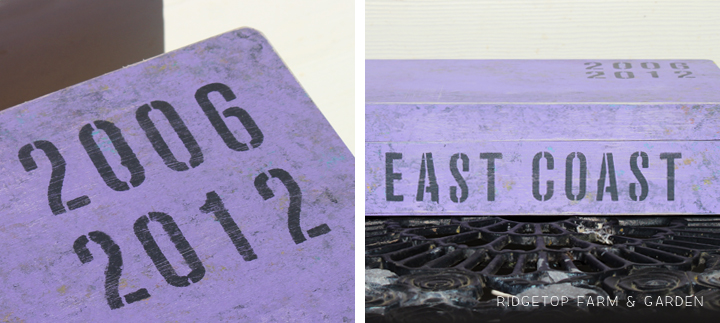
STEP 3: PAINTING ON THE YEAR
Martha didn’t do this step, but I took creative liberties and added the year(s) of our vacation(s). I painted the numbers on exactly as I did the letters naming the place.
FINISHED BOXES
Now to go on vacation and paint more boxes.