The entire month of January the girls have been laying us at least a dozen eggs every day. So, we took some of those eggs & got a bit crafty.
PREPARATIONS
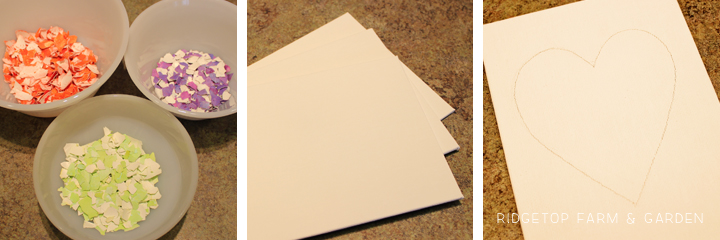
First thing’s first. I hard boiled 2 dozen eggs. Then I dyed the boiled eggs using food coloring, water & vinegar. After the eggs dried, I peeled them. Then came the part that seemed to take forever. I tried to take most of the thin membrane off the shells. This was easy enough, but just took a long time. I also broke the larger shell chunks into smaller pieces.
We used 5 x 7 canvas panels for our mosaics. I got mine at Joann’s. Regular price is 3/$3.99 (but, don’t forget to use your 40% off coupon). I drew a simple heart on each panel.
WORKING ON THIS STICKY PROJECT
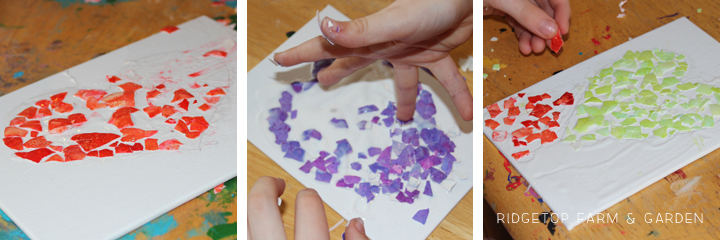
This is where the kids come in. I gave them each a panel to make their own mosaic. We used regular Elmer’s glue to adhere the eggshells. We found it easiest to dump glue on the panel then spread it around with our fingers.
After filling in the heart, the kids decorated the background.
For being such a simple idea, this project took longer to complete than I would have thought.
When the Elmer’s glue was dry I covered the mosaics with a decoupage finish. This wet glue did collect & spread color from the eggshells a little bit. It wasn’t a problem as long as I wiped off my brush before going over a new color.
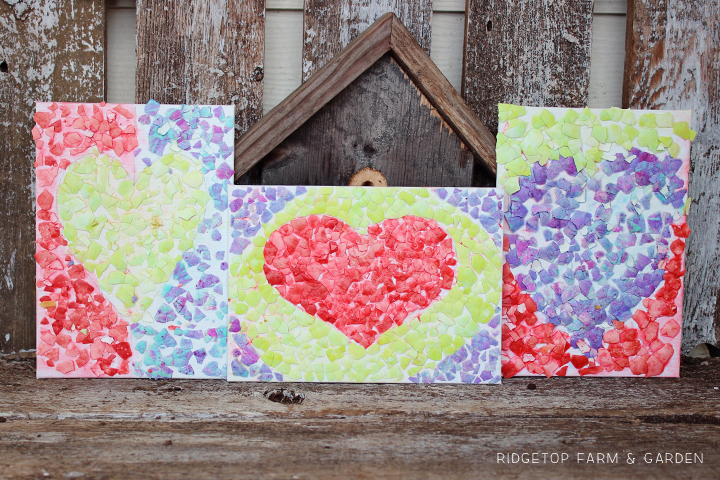
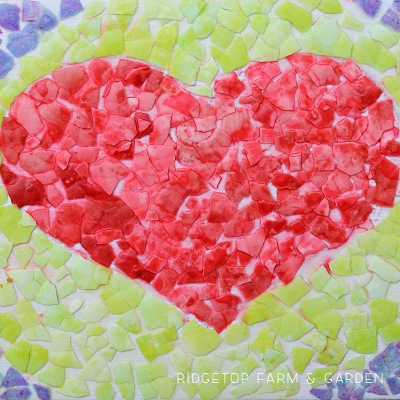
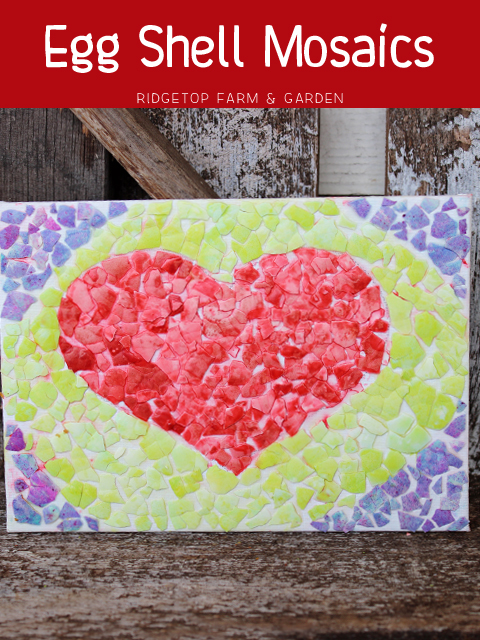
COMPLETE WORKS OF ART
Our finished mosaic masterpieces just in time for Valentine’s Day.