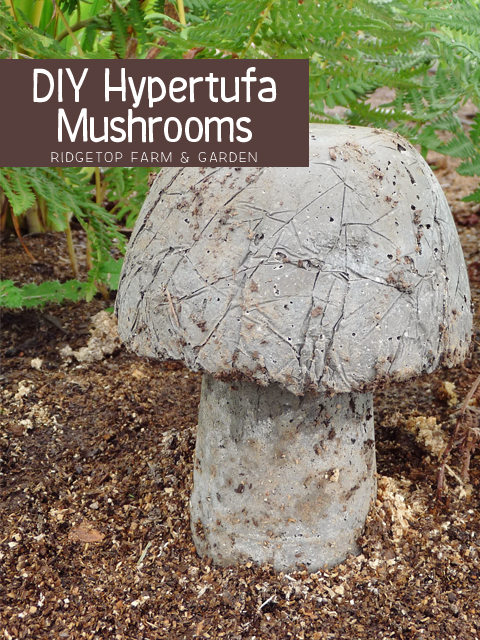
I remember years and years ago watching Martha Stewart make hypertufa on TV. I loved the idea & knew one day I’d have to try it myself.
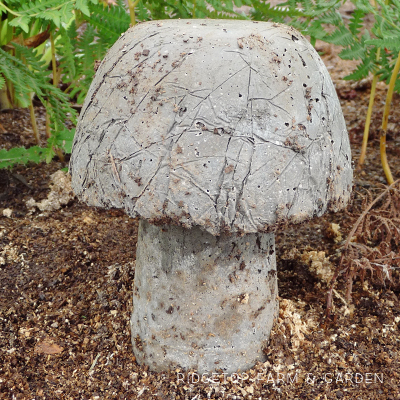
And, I have. A number of times. My preferred masterpieces are mushrooms, but the possibilities are endless as to what you could create.
The process of making hypertufa yard art is a bit time consuming, but fairly simple and so worth it. I’ve had some of my pieces for 5 years now and they have held up to all the elements – kids, critters, freezing temps & snow.
MY HYPERTUFA RECIPE
I use almost equal parts of all four ingredients. I tend to use a little more Portland cement & sand than vermiculite & peat moss, though. This makes my hypertufa a bit heavier than others, but should last a little longer.
Sand
Vermiculite – You can use perlite instead. I prefer vermiculite simply because it has a bit of sparkle and white perlite balls are ugly.
Peat Moss
MAKING THE MIX
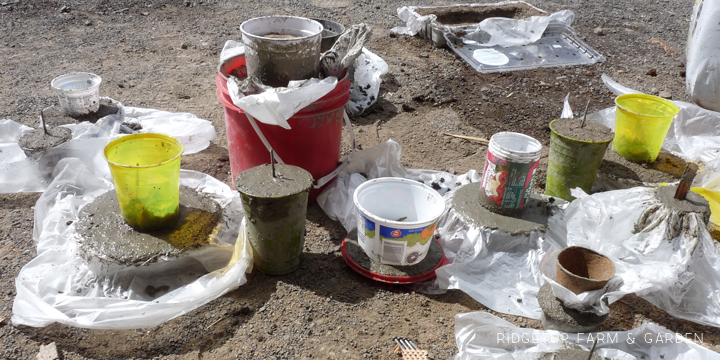
Pour all dry ingredients into a bucket or wheel barrow. Mix with a trowel, adding enough water to get a cookie dough consistency. Make sure to wear gloves, as Portland Cement will irritate your skin.
CREATING HYPERTUFA YARD ART
This photo is from my very first hypertufa batch back in 2010. I used all sorts of different containers for the mushroom pieces. Usually I used some kind of bowl shape for the head of the mushroom and a cup for the stem. I was really nervous about the hypertufa sticking to the bowl molds, so I lined them with garbage bags we had lying around. Cooking spray would have also worked. However, looking back, I’d use the bags again because I like the texture it gave the mushrooms.
The nails sticking out of the hypertufa in the cups were meant to stick in the ground to hold the mushrooms in place. Really, they’re just a joke. Itty bitty nails do not help support the mushrooms. Rebar works much better.
After making all the pieces, I covered them with plastic and let them sit for a day or two.
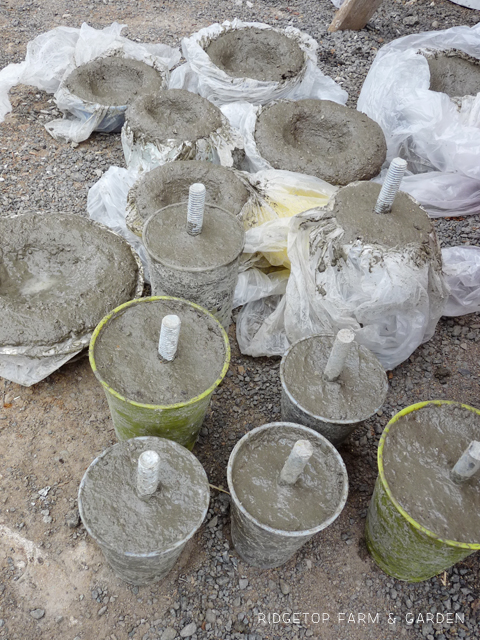
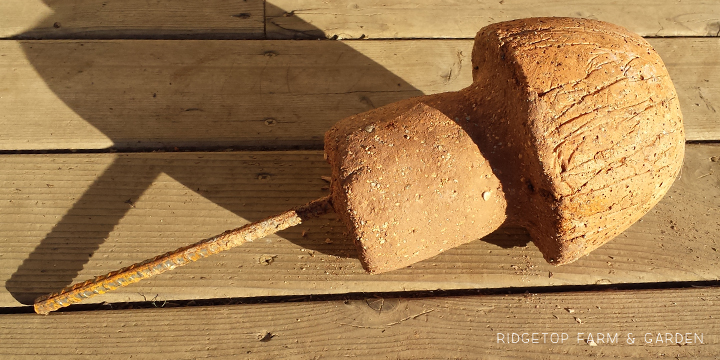
A different batch looked like this. Same idea as the first, but I added chunks of rebar to the stems. This worked better than the nails, but longer pieces of rebar work even better.
I also rounded the bottoms of the mushroom heads.
ATTACHING THE MUSHROOM PIECES
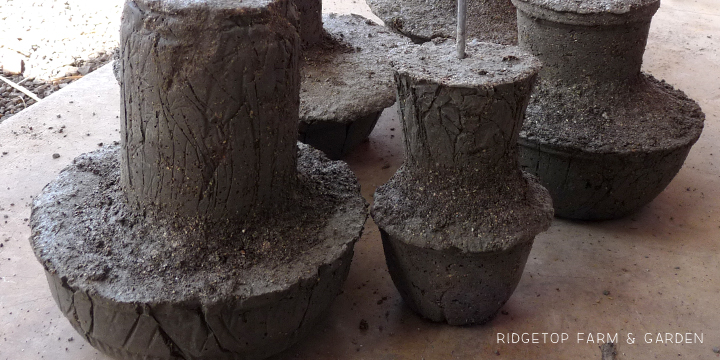
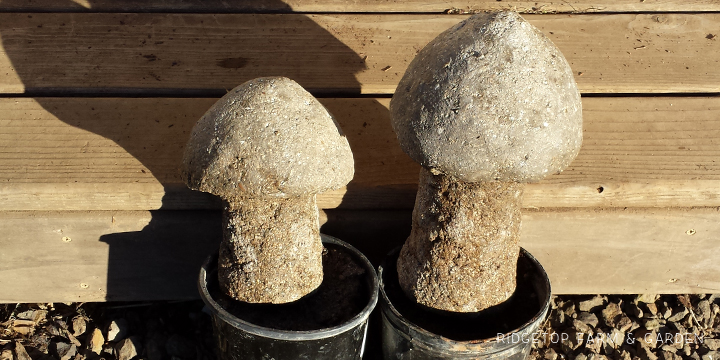
After letting the pieces sit for a day or two to cure a little, I take them out of their molds.
I attach the head part to a stem piece by mixing more hypertufa and using it as glue. I tend to make this mix more cement style than hypertufa, meaning less peat moss and vermiculite.
CURING
After putting the mushroom pieces together, I mist them and cover them in plastic. And then comes the hard part. Waiting. Hypertufa needs to cure for about a month. Occasionally, I give the mushrooms a mist. But, that’s it. They are pretty much left alone in our garage until the month is up.
MUSHROOM VARIETIES
My mushrooms are all similar, however I do try to add a hint of variety.
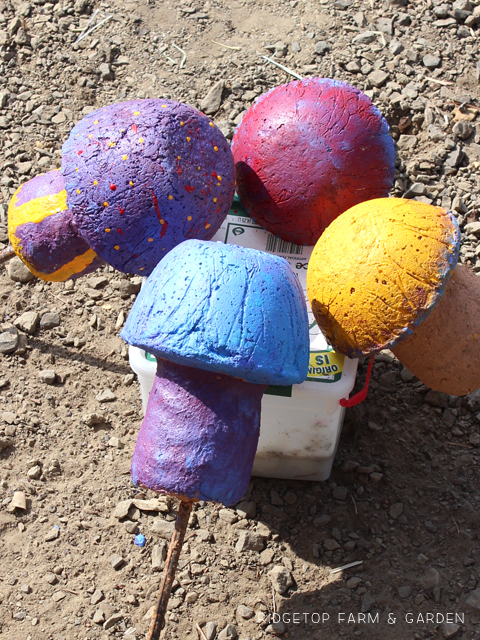
I have tried adding liquid cement coloring to the mix for colored mushrooms. I don’t love it. I don’t hate. It worked perfectly fine. I’m just not a fan of the particular color.
Notice the longer rebar. This is the ideal length to keep the mushrooms in place.
Yet another variety. These were made the same way as my other mushrooms. But, on the day I made hypertufa to glue the pieces together I also added hypertufa mix around the head and stem for a slightly different look.
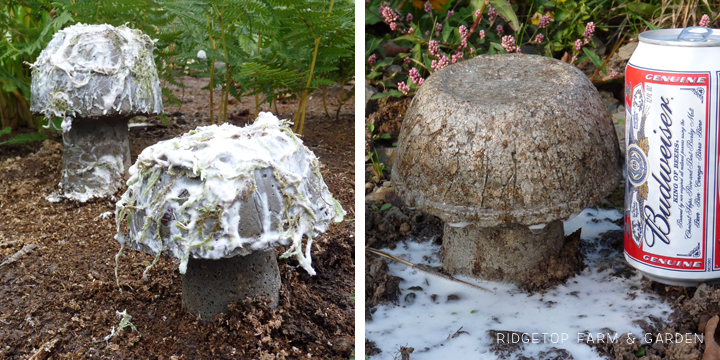
To give the mushrooms an aged appearance, I read you can make a moss/yogurt smoothie and apply it to your hypertufa to help promote moss growth. I was feeling lazy, so I didn’t bother blending it. I just mixed some moss in with the yogurt. I probably should have taken the time to do it correctly.
In my web research I found that adding beer can also promote moss growth. I had a beer in the fridge, so I dumped it on a mushroom. If I didn’t have Farmer John convinced that I was a kook before, I sure did when he walked by seeing me dump a beer on cement – on purpose.
July 2015 Update: Neither of these moss enhancing tricks worked for me. Boo!
Using outdoor paint, a few mushrooms received a makeover. I love their bright colors. However, Farmer John refers to them as my psychedelic mushrooms.
MORE WITH HYPERTUFA
The fun thing about hypertufa is making whatever you can come up with. Primarily I make mushrooms, but occasionally I make some sort of container.
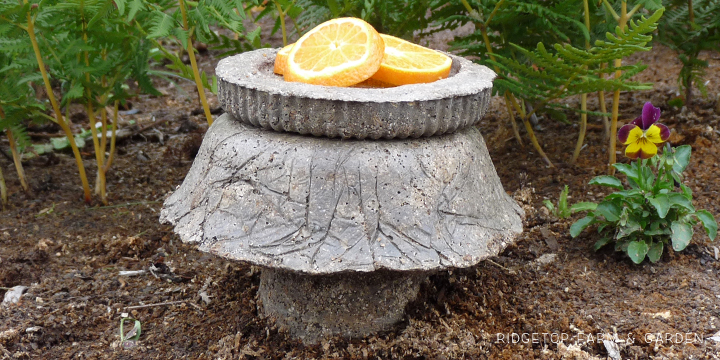
Some birds and bugs like slices of fruits. So, I added a hypertufa plate on top of a flatter topped mushroom.
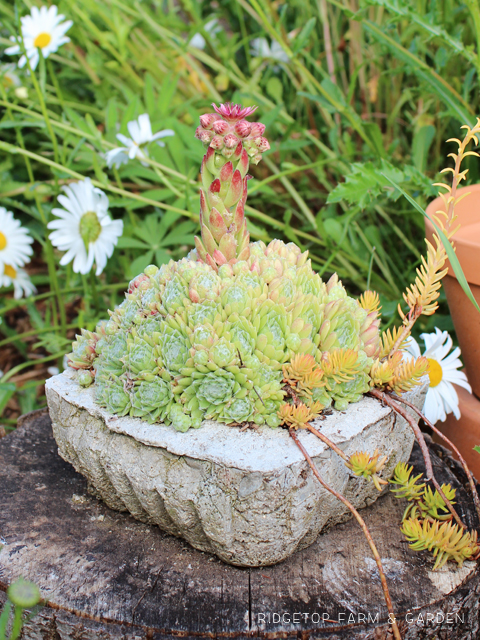
I have also made planters. This particular one was made from the bottom part of a plastic clam shell container. The succulents have been in there for years and continue to thrive.
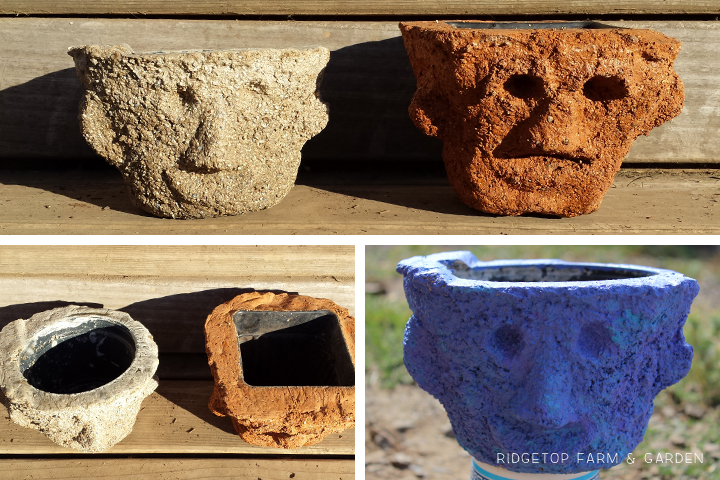
I love the wonky cement faces I see in gardens. They have such character. So, I tried making my own. They’re not the best work I’ve ever done, but honestly I’m not sure how I would have done it differently. They were a bit of a challenge for me.
To make the faces I smooshed hypertufa mix around the black potting container, then added and subtracted hypertufa as needed for eyes, nose, mouth and ears.
I had planned to take out the plastic pots after the hypertufa cured. But, they don’t seem to want to come out. So, I guess they’ll stay.
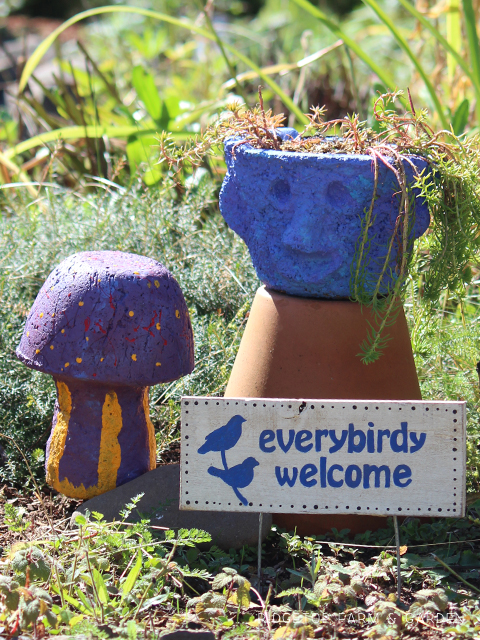
A mushroom, wonky face container and pallet sign living together in our Bird Village.
Have you given hypertufa a try? What is your favorite item to create?