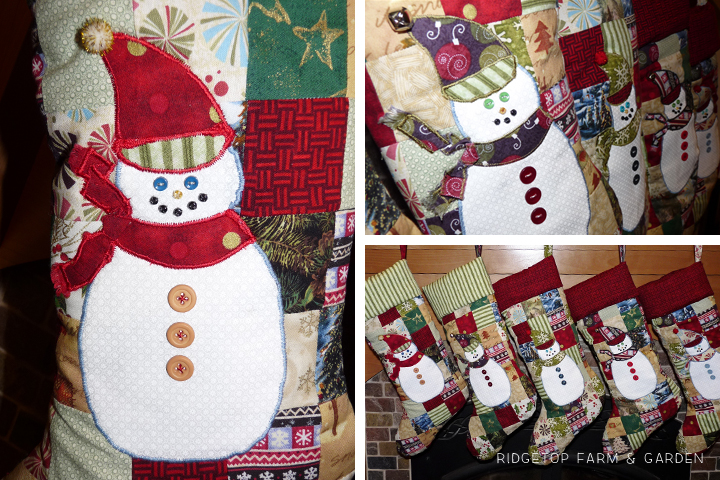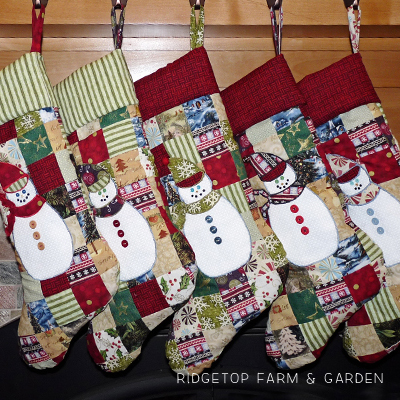
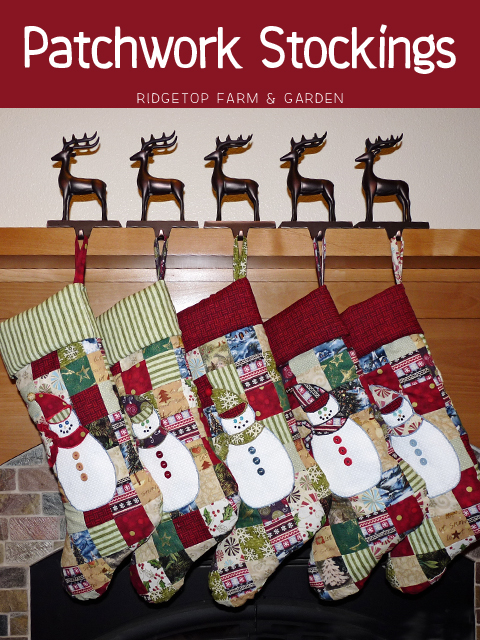
A number of years ago I bought myself a used sewing machine. One of the first projects I made were stockings for the 5 of us. I have always wanted to make us stockings. Woo hoo! I finally made them & years later I still love them.
The pattern I used was Joann’s Debbie Mumm Stocking. Overall, the stockings were fairly easy to make. My two biggest problems were reading the directions correctly & the applique snowmen. For some reason I have a hard time understanding pattern directions. There is always some part that throws me off & I end up undoing what I’ve just sewn together. I have never appliqued, but I decided to give it a try. There was a little bit of a learning curve, but I got it figured out.
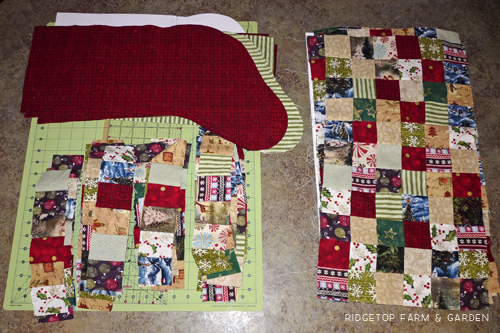
CUTTING FABRIC & PATCHWORK
The first step in creating the 5 stockings was to cut 660 2.5″ squares, using 15 different fabrics.
Then I sewed 6 squares into a strip, continuing with all the squares. Next, I sewed 11 of the strips together to make one big rectangle shaped piece of fabric. I then cut the stocking pattern out of that rectangle. I also did this for the back of the stockings.
Next, I cut the stocking pattern out of my lining fabric & batting. I also cut the pieces for the cuff out of lining fabric & batting.
APPLIQUE
Right or wrong, this is how I sewed my appliques. I began by cutting out my shapes from fabric and the heat & bond. Then I placed the heat & bond on top of the patchwork stocking and placed the snowman fabric on top of the heat & bond. I had never used heat & bond. But, it was amazingly simple – literally, the iron heated the material up & it bonded to my fabric. After the snowman was fused on, I sewed around the edges. It took me a few practice tries on scrap fabric to get the stitch just right. Also, the inner corners were tricky but I faked my way through it.
Next, I used the heat & bond to fuse on the hat and scarf. Then, sewed around them. The outside corners were the tricky parts for me this time. And finally, I sewed on buttons & beads for the detail. After finishing the snowman, I placed the front and back of the patchwork stocking right sides together and sewed them to make the outside of the stocking.

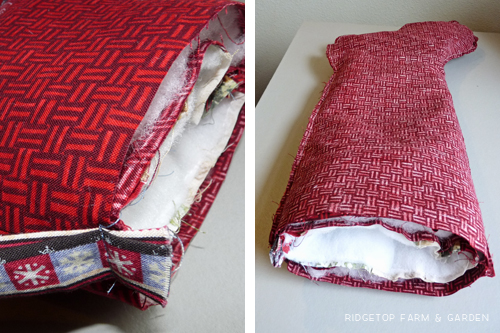
PUTTING IT ALL TOGETHER
Putting all these pieces together was the hardest thing for me to figure out. One day I’m hoping I can get through a project without any mistakes.
The Lining ~ Here was my biggest mistake: The directions said “Sew the lining with right sides together leaving an opening for turning.” So, my thought process told me – Duh! there’s a huge opening at the top of the stocking. I was smart enough to realize I didn’t want to sew together the top of the stocking. But, what I didn’t realize was that it actually meant to leave another opening near the bottom.
The Cuff ~ Again, I didn’t understand the directions. So, I just did what worked for me. Which, in the end, is what I think the directions might have been saying anyway – it’s just not the way I read them. I think the main difference between what I did and what the directions say is that I sewed my fabric loop together before placing the batting on the fabric. That way it was out of my way while I was sewing. I wish I would have taken a pic of this stage because it was really simple, but the directions through me off.
The Hanging Tab ~ Directions say: “Cut out 2″ x 8″ fabric piece for the hanging tab. Fold in half lengthwise and sew a 1/4″, turn” This one I actually figured out on the first try.
Putting it all Together ~ This is where the fact that I hadn’t left an opening at the bottom of my lining messed me up. I read & actually understood the directions. But, when it came time to turn my stocking I obviously couldn’t turn it because there wasn’t an opening to turn it through. So, I took it apart, reread the directions, & after lots of frustration I finally figured out that I had it together right in the first place. I just hadn’t left the opening in the bottom of the lining. After making the first one, the others were easy to finish.
FINISHED STOCKINGS
I am pleased with the way they turned out even with the couple of small problems. One day maybe I’ll make a matching tree skirt.